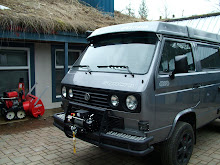
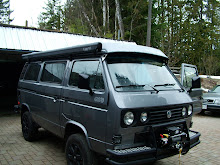
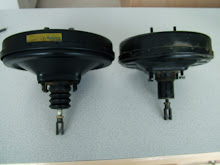
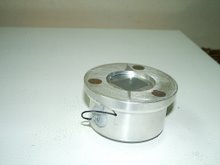
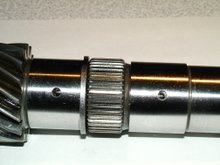
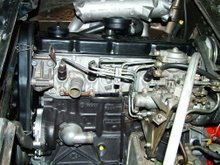
On the Syncro's it is hard to align the engine and transmission with the front differential in order to minimize driveline vibrations.
The engine has to be mounted slightly offset to one side so that the driveshaft sits in the center of the frame.
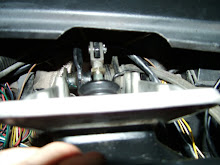
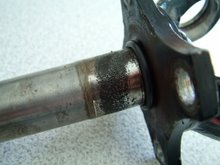
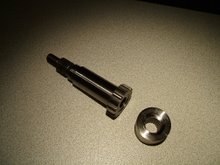
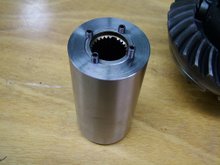
To make this easier to set up, I have made an aluminum hub that holds the laser, taken out of a laser level, and has magnets on the flange side so that it just sticks to the driveshaft flange.
I can now measure the distance between the frame rails and the centerline to make sure the engine and transmission are square with the frame and at the same time aligns with the front differential center flange.
Saturday, May 19, 2007
Subscribe to:
Post Comments (Atom)


14 comments:
Hello Hermann!!
Well, sometimes you think you have seen it all, and then someone like you comes along! Stunning work, very, very well done! I really like your approach to solving the problems. Of course, you are extremely talented, to help that problem solving reach the finised form.
Q: can you supply dimensions for your laser alignment tool please?
Thankyou, and I am following your project closely. I can only hope to be able to build my Syncro as well as yours.
Respect, Paul.
Hallo Herman, ziet er zeer goed uit! Zou je wat meer detailes kunnen geven over de versnellingsbak. De olie leidingen bv en het ombouwen naar diff lock.
Alvast bedankt,
BART
Hilvarenbeek
To Paul: Thanks for your comment Paul.
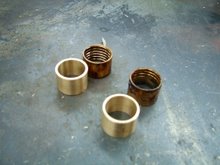
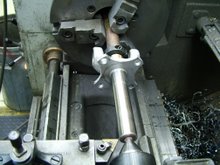
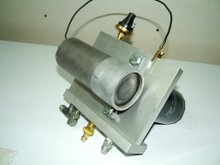
The easiest way to make this is to take a piece of 3.500" aluminium bar and drill a hole in it that matches the OD of a laser pointer.
I have used the laser assembly out of a laser level,the hard part is to install a battery and switch into the aluminum hub.
The laser pointer comes complete with battery and switch and can easely be glued into the hole.
Then machine the under side of the hub so that it fits over the spigot of the tranny flange (1.850") and drill three holes in it to hold the magnets.
Install the hub on the tranny flange and rotate it to align the laser pointer before the glue sets.
The one that I have made is about 1.750" high.
Hey Bart leuk om wat uit Nederland te horen!
Ik zal in Engels antwoorden zodat iedereen er wat aan heeft.
Regarding your question about the tranny oil lines and front diff lock:
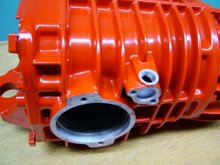
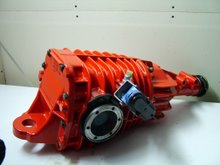
I have used 3/8" and 1/2" Swagelock fittings and stainless steel tubing as oil lines. They have NPT threads going into the transmission housing.
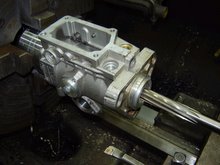
For the front diff lock I have used a locking diff from a transmission, all you have to do is to install the original front ring gear onto it and set the backlash exactly as it was before.I also replaced all the bearings.
I machined the front diff housing exactly like the transmission housing so that the shift rod and sleeve fits in there. Also you have to drill and tap the opening for the electrical switch. The rough openings are cast into the housing, all you have to do is finish the machining.
This is for your V6 Baja Beetle project I presume?
Hey Herman, yes its for my 4x4 V6 BAJA Beetle project. The plan is to build a beetle with all the parts of a T3 syncro. High on its big wheels. Special long travel A-arm suspension. Etc. Etc. Starting to collect all the driveline parts.
Have the front diff., gearbox, cardanshaft, front uprights so its starting. Your work looks great. Hope that Ican ask you a lot of questions...........keep us updated.
Best regards, BART
hi there herman,
once a while ago i found your website with the modifications of your vanagon. Now i only find your BLOG. is your site down ?
best regards, stefan heinrich
Hi Stefan, it is the link that says" more Vanagon pictures" just above the top picture or go here:
http://picasaweb.google.com/itzdshtz/VanagonSyncroProject02
Thanks for looking.
Cheers Herman
Came across your site while researching how to align the driveshaft on my 86 syncro. I have a 1.9TDI installed and can't find the sweet spot for the alignment and was wondering if you'd be willing to rent out your laser tool? Let me know if you would.
Thanks, Tom Verry
fairweather@westelk.com
Sure, I'll borrow it to you.
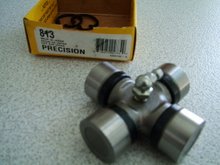
How are the universal joints, have you checked the bushings?
If there is any play, you won't get the vibrations out.
Did you install the rubber donut towards the front diff?(just for the diesels)
I'll Email you about the tool.
Herman
That'd be great. I am using a new prop shaft from Gowesty. I removed the shaft and discovered that I have a significant vibration coming from he engine as well around 2800-3000 rpm. That corresponds to the driveline vibration at 40-45 mph so have a multi-layered issue. I want to replace the solid rubber mounts with hydraulic mounts and do the alignment at the same time since I don't think the engine was mounted properly. I had a pro shop do it and I didn't exactly get pro shop quality :-( I did a quick check with a laser pointer and the dot was way off to the pass side on the garage door! So even if my laser is off by a few degrees I still have significant alignment issues.
Haven't seen a email yet, can paypal $$ to you for shipping/rent/insurance.
Thanks, Tom
Hi Tom, I had send you an Email to:
fairweather@westelk.com
Is this the correct adress?
Herman
Herman, your laser alignment tool is great, I have duplicated it and plan to use when installing my newly rebuilt driveline. My question is, Could you explain in a little more detail the alignment process for the driveline.
Thanks
Phil
Hi Phil, the way that I do it is to stick the laser tool onto the driveshaft flange of the transmission and mark where it hits the front diff, then take it off the transmission and stick it on the front differential flange and mark the spot where it hits on the tranny.
If the alignment is correct, both the marks should be at the same distance below the opposite flange center.
If it hits on the side of the flange, you will have to adjust the engine sideways.
I had to shim the rear mounts of my front diff up slightly in order to end up with the same measurements.
Herman
Hey, nice site you have here! Keep up the excellent work!
Laser Alignment Systems
Post a Comment